| مهندسی مکانیک در این تالار مباحث مربوط به مهندسی مکانیک مطرح میشود |

06-04-2014
|
 |
مدیر بخش مکانیک - ویندوز و رفع اشکال   |
|
تاریخ عضویت: Sep 2009
نوشته ها: 2,586
سپاسها: : 5,427
6,159 سپاس در 1,794 نوشته ایشان در یکماه اخیر
|
|
 نكات و ترفندهايي در CATIA V5
Replacing CATIA V4 with V5 - CATIA V5 has now reached a level where you can start thinking seriously about replacing CATIA V4 with V5. Depending on your needs, many factors will influence your decision as to whether it's time to switch to V5, but we can identify three subjects that everyone is concerned about: interoperability, data migration and interfaces. Here is a summary of the current situation. What you can do today: Interoperability: By interoperability, we mean using V4 data in V5 or using V5 data in V4. From V4 to V5: V4 models can be easily inserted as components in a CATProduct. Once inserted, they can be used the same way as a V5 component, and you benefit from a full associativity between the V4 model and CATIA V5. Assembly and Product Structure capabilities: V4 models are fully compatible with these two workbenches. You can copy-paste (insert, renumber, etc.) them as if they were real V5 CATParts. Design in context: You can use a V4 solid to design a new CATPart in context of V4 solids. You can use a face as a sketch plane, relimit a V5 Pad using a V4 solid, etc. DMU Solutions: You can use V4 models in the four DMU workbenches. Drafting: You can generate the drawing of a CATProduct containing V4 models. From V5 to V4: CATParts can be imported (with Solid-Import capability) into a V4 solid. At that point, the V4 solid can be used in all CATIA V4 downstream applications and benefits from a full associativity with the CATPart.
Data migration: Data migration is the conversion of V4 data into V5 data and vice-versa. We can simplify the actual situation into six points: All V4 elements can be translated without their history (As_Result) into CATIA V5. V4 solids can also be translated with their history. If you are using exact solids, make sure that they are "Exact" solids. If you are using mock-up solids, make sure that they are not "isolated." V4 drawings as well as V4 Kinematics can be translated in CATIA V5. V4 3D Detail Libraries can be translated into V5 catalogs. Complete 3D data fromV4 models can be translated in batch mode. Save "as model" of a V5 CATPart (without associativity).
Interfaces: For 3D data, both IGES and STEP already give better results than have been achieved in V4. For 2D data, partial results are reached with DXF.
-- Submitted by Fred Beaudin, is a CAD/CAM consultant for ACT working in the CATIA Consulting Department of Dassault Systèmes, France. His main fields of
expertise are V4-V5 interoperability and manufacturing. He can be reached at fbn@act.qc.ca.
------------------------------------------------
Lose the external references - Please note it's not possible to work with external references for kinematics joints in DMU Kinematics V5. DMU Kinematics
reduces automatically the number of degrees for the kinematics. The user suspects that he or she misunderstands at first, when the popup menu appears
saying "kinematics overconstraint," etc. Switch off the option keep external reverences.
-- Heiko Oldendorf, managing director, free d graphics, Germany
---------------------------------------
Calculating assembly weight - CATIA can give you the weight of assemblies with parts of different materials. You must analyze each part independently, store the results for the parts and then combine the results to get the final assembly weight, center of gravity, etc. Call up your solid assy model. Go to the analysis/inertia/compute menu. Pick one solid; enter the material density of the part; hit yes to store the results. Do this operation to all the solids that you need in the assy model. Now go to the combine sub-function in the analysis/inertia menu. Pick the solids that you have computed and stored the results for. (Steps 2, 3, etc.) [Note: If you did not calculate the inertia for each individual part solid, that solid will not be included in the combination to get the final result.] If your alphanumeric window is open, you will see the information change as you pick the solids. The selected solids will highlight, so you won't make the mistake of re-picking them. When you're done picking the solids, at the bottom of the alphanumeric window you will get the final results. It will be the final entry in the alphanumeric window, so be careful what you read from it, since there is no distinction between the final result and the previous results.
-- Hector Espinoza, mechanical designer, Control Systems Division - Military, Parker Aerospace, Parker Haniffin Corporation, Irvine, Calif.
---------------------------------
Rotate & zoom - Have you worked with Pro/E before you began using CATIA V5? Then you are used to using the ctrl key for rotate and zoom. In V5 you also
can use the ctrl key with your mouse button to rotate and zoom, by adding your middle mouse button. Just hold down the ctrl key and then the middle mouse
button to zoom. To rotate, start to hold down the middle mouse bottom and then hit your ctrl key.
-- Submitted by Anders Fors, application specialist, Xdin AB, Västra Frölunda, Sweden
------------------------
Collapsing the tree - I found a very useful way recently to collapse the tree in one go by clicking on a single icon. The Method: Tools/Customize/Commands Select AllCommands from the Categories list (at bottom). Select Collapse All from the Commands list Select Show Properties. Select an icon button Select Tree icon at the bottom right corner of Page 1 (or any preferred icon). Select Close. Select Collapse All (text) in Commands list and drag onto the update icon on the bottom toolbar (or any preferred icon). Once this is selected in that workbench, your specification tree will collapse. You need to do this for all the workbenches you use it for; i.e., Part Design, Assembly etc.
-- Submitted by Mark Hodder, Concentric Asia Pacific, Pennant Hills, New South Wales, Australia
---------------------------
Including multiple objects - While using the Rectangular Pattern command in the Part Design module, you can include multiple objects in your pattern. To do so, just multi-select (while holding the CTRL key) the objects before clicking on the Rectangular Pattern command. You will then see the list of objects to pattern in the "Object to Pattern" section of the dialog box.
-- Submitted by Dominique Croteau, idCAD Consulting, Montreal, Canada
--------------------------
Faster changing of workbenches - In CATIA V5R7 SP1 customize the Start menu to include your favorite workbenches. Point at the current Workbench icon with the mouse and press MB3. A panel of the workbenches in your Start menu appears next to the current workbench icon-slide down and select the workbench you wish to change to. If you have other V5 documents open, you will note in this panel that some of the workbench icons have a drop-down arrow on them. From the drop-down select another open document suitable to the workbench type to make current with the selected Workbench active. The new option in the drop-down changes Workbench in the current document the same way the first technique outlined does, when multiple documents are open.
-- Submitted by Barry Caudle, industry specialist, CONCENTRIC Asia Pacific, Pennant Hills, New South Wales, Australia
------------------------------
Avoid wire-frame - I recommend having the least amount of wire-frame possible (use cuboids and cylinders). This will aid downstream applications such as
PARAM3D, CAM and IGES translations. Note: if wire-frame is used for revolutions, then use Fillets and Chamfers from the SolidE function rather than incorporating these in the profile to be revolved. Remember that SolidE > modify >geometry > param > Cont. > (new for old) can minimize the number of dimensions that blink (not associative) if the profile is to be changed.
-- Submitted by Mike Hughes, IEng MIED, senior CAD designer, BOC Edwards, Shoreham, UK
-----------------------
Staying in your command - Users of CATIA V4 will be used to going into a function such as Point and creating several points before changing function. In
V5, however, the default behavior is to drop out of the command after the element has been created. Now we know that if you double-click the command you
can stay in it. But how many of us don't think we need to, till it's too late? Then we have to start the command again. My tip is to use Repeat Last Command. This is should be accessed from the keyboard with Ctrl - Y, because it is the quickest way to re-launch that last command without really thinking about it. I use this instead of the double-click as a matter of course.
-- Submitted by Ian Phillips, Munich, Germany
--------------------------------
Dimensioning between circles - Here's a tip for dimensioning between the centers of two circles that lie on different planes: sketch the first circle on one plane. Select the second plane, sketch the circle, then place a point and constrain it concentric with the first circle lying on the first plane. (Without this point dimension occurs from the center of the second circle to a tangent of first circle.) Place the dimension between this point and the center of the second circle. Change the point as a reference element.
-- Submitted by Suresh Balasundaram, training officer, Amrita CAD/CAM Center,
Amrita Institutions, Tamil Nadu, India.
-------------------------
Reorder your menus - To reorder the function menus in CATIA V5, after a "blood, tears and sweat" modeling session, do the following. Go to the CATSettings
directory (standard in the following path: c:/Documents and Settings/"user"/ApplicationData/DassaultSystemes/CATSettings) and delete only the file DialogPosition.CATSettings. (The directory Application Data is hidden) Now you can start again with the default position of all your workbenches and
menus.
-- Submitted by Mr. Gerdy Vandamme, T.V.H. Forkliftparts, Driemasten, Gullegem (Belgium)
-----------------------------
Copying An Existing Radius of a Circle - Draw the required circle, drag so that the reference circle is highlighted and right-click on the mouse button. A contextual menu pops up; choose Parameters and Copy Radius.
-- Submitted by Eddie Adams, product designer, Weidmuller Interface Ltd., Kent, England.
ویرایش توسط bigbang : 06-04-2014 در ساعت 11:39 AM
|
06-04-2014
|
|
مدیر بخش مکانیک - ویندوز و رفع اشکال |
|
تاریخ عضویت: Sep 2009
نوشته ها: 2,586
سپاسها: : 5,427
6,159 سپاس در 1,794 نوشته ایشان در یکماه اخیر
|
|
نكات و ترفندهايي در CATIA V5
Dimensioning a 3D Component Using Orthographic Views - You might opt to go in Sketcher and use the Dimensions command. However, in doing so you would realize that some dimensions are a little off. Instead of going back to Part Design to modify it, you could input "fake" dimensions to save time. It can be done this way: Right-click on the desired dimension Select Properties Select the Value tab and check the Fake Value box near the bottom You can now input the true dimension (numerical or alphanumerical)
-- Submitted by Jean-Francois Brunelle, Montreal, Canada. Installation Tip for V5 R3 SP3
---------------------------
- Problem:
Online help (F1) doesn't work on NT
Solution: Replace d:\Dassault Systemes\B03 Doc\resources\msgcatalog\CATIAId2url.CATNls (Note this file is of 0KB file size) With the same file from the documentation cd: CD Drive:\resources\msgcatalog\CATIAId2url.CATNls (24KB).
-- Courtesy of CATIA Users of Central Ontario, www.ca.geocities.com/catiawebca/tips/install_tips.html.
-----------------------------
Minimizing update errors in circular patterns when refining a part - When dealing with circular parts with many patterns and features tied to the centerline of the part (i.e., a bolt hole pattern tied to the center of a wheel), I suggest the following to minimize the number of update errors as you
refine the part in future revisions: Insert an Open Body into the product structure and select Define in Work Object. Rename the body as REFERENCE_GEOMETRY. Insert a point at X=0 Y=0 Z=0 and rename it as ORIGIN. Insert a line through a point (the new origin) and a direction (normal to a surface perpendicular to your axis) at any length, and rename it as AXIS. Define your objects outside of the new body to eliminate confusion between elements. When defining a pattern in your part body, select the new line (AXIS) as the reference element.
By using this method, any changes to the main body or main sketch will not change the reference element used in a pattern. This procedure can save on reselecting the reference elements in a pattern each time you update or change the main body, and the pattern is always symmetrically located to the true center of your part - not the center of a circle which can shift.
-- Submitted by Jim Black, mechanical design engineer, Alcoa Wheel & Forged Products, Cleveland, Ohio.
--------------------------------------------------
Using smart names in product trees - When designing in V5, always use "names" for elements. After a complex design is complete, it is far easier to find Wheel_Bolt_Hole_Pattern in a tree rather than CircPattern.32 for editing. I use this method, and I try to name the feature in the tree after its role in the design. Along with using names, the IBM representative for my company suggests using "underscore" instead or "spaces" between words in a name.
-- Submitted by Jim Black, mechanical design engineer, Alcoa Wheel & Forged Products, Cleveland, Ohio.
----------------------------------
Using sketcher to establish die draw views of part - Once in sketcher, name a view so that when you exit sketcher, you will be able to call up that named view without having to be in sketcher.
-- Submitted by Cliff Streeter
-----------------------------
V5R7 Tip - When converting V4 surfaces to V5, you will probably encounter problems with gaps and cracks, which make the surfaces difficult to use. Therefore, try the following: In V4 make a skin (*SKI) of the region of interest and copy/paste the skin for a better result. (This entity may not be offsettable for part design.) Use the JOIN function with a merging distance set near V4 tolerances (i.e., 0.0003 inches) of surfaces/faces brought over individually to resolve gaps/overlaps between surfaces. Use the HEALING function similar to above for more control over individual surfaces.
IBM has a white paper on its interoperability website, www.ibm.com/de/caeserv/cipo/, which has more detailed information.
-- Submitted by Clifton Davies, Lockheed Martin Aeronautics Company, Palmdale, Calif.
------------------------------------
Improve .stl File Accuracy - To improve .stl file accuracy and to reduce faceting on .stl files, go to tools/options/display/performances. Change 3D accuracy from fixed to proportional, and change the setting to .02. Make sure the curves accuracy is set at 100 percent.
-- Submitted by Robert Gansen, Johnson Controls Inc., Holland, Mich.
----------------------------
Tip for CATIA V5 R4 - For this tip, suppose you have designed a 3D component in Part Design and want to modify its dimensions. You normally would go into Sketcher, modify the desired sketch, and then visualize the modified 3D part. However, sometimes the part itself won't show up in 3D, only the sketcher lines-as if no sketch-based features were applied. This would occur even though a 3D function (sketch-based feature) was previously applied on the text (i.e., pad, shaft, etc.) and would show up in the history. To solve this, apply the same 3D function (sketch-based feature) a second time (it will appear at the bottom of the history) on the sketch. Now your 3D part will show up once more. Finally, delete the sketch-based feature located at the bottom of the history.
-- Submitted by Jean-Francois Brunelle, SCP Science, Montreal, Canada
---------------------------------------
Creating a CAM path on a cylinder - Suppose you know where you want a CAM follower to start and also where it should end, but you don't know how to project a CAM path on a cylinder. While selecting endpoints is critical, the path is not necessarily that important. Here's the solution. First, draw a centerline profile between the start and end and then project this onto a cylinder. Remove the section of the cylinder that intersects this projection.
The result is the desired CAM path.
-- Submitted by by Dan Dangremond, Johnson Controls, Inc., Holland, Mich.
-----------------------------------
Freeing up Storage Space - We often use very large files of models to create a small part that will interface with a large model. Since several designers will interface with the same large model, we need to free up valuable storage space and speed things up. To do this, we take the CGR file and place it into a shared cache directory to which everyone can have access.
-- Submitted by Dan Dangremond, Johnson Controls, Inc., Holland, Mich.
-------------------------------------
IMPORTING 2D SPACE GEOMETRY INTO SKETCHER - Importing 2D-space geometry into V5's sketcher is an easy task. I have imported V4, IGES and STEP files successfully. Here are the steps for different variations. For V4 geometry: Open V4 2D space model in V5 operating mode. Copy V4 data into new V5 part model. Highlight parts to be copied; press control V. Start new V5 part model. Control/paste into V5 model. Save V5 part model as CATPART. Project 2D space geometry onto sketch. Open sketcher by selecting sketch plane and clicking the sketch icon. Highlight items to be copied into sketcher. Press project 3D geometry onto sketch icon. Exit sketcher (at this point the sketch geometry is not editable, as it is linked to the solid model input). Delete open body geometry. A warning will appear stating sketcher error with a recommendation to isolate. Select the isolate option. This will isolate sketch geometry from the open body geometry. Sketch geometry is then editable. Sketch geometry does not have any constraints relative to each other; i.e., a line is a line, and is not constrained to another line. Save model at a CATPART.
For IGES or STEP files of 2D space geometry: Open IGES or space file of 2D space model in V5 operating mode. Save as CATPART. Project 2D space geometry onto sketch. Open sketcher by selecting sketch plane and pressing the sketch icon. Highlight items to be copied onto sketch. Press project 3D geometry onto sketch icon. Exit sketcher (at this point the sketch geometry is not editable as it is linked to the space geometry input). Delete open body input.
A warning will appear, stating sketcher error with a recommendation to isolate. Select the isolate option. This will isolate sketch geometry from the open body geometry. Sketch geometry is then editable. Sketch geometry does not have any constraints relative to each other; i.e., a line is a line and is not constrained to another line. Save model.
-- Submitted by John Hill, Honeywell International
--------------------------------
CHANGING A SKETCH SUPPORT - Changing a sketch support is useful when you need to change your design, especially since redrawing the model can be tedious and time consuming. The steps to change a sketch support are as follows: Double-click the part for activation. Right-click sketch. Select Change Sketch Support.
-- Submitted by Davat Yilmaz, Istabul Ulasim A.S., Turkey
---------------------------
PATTERN ICON TIP - While most of the icons in part design work in the same manner if you select the object(s) and then the action (icon), or the icon and then the objects-the pattern icon doesn't. If the pattern icon is selected, then the current solid or a single primitive can be patterned. If you want to pattern multiple features, select the features first by holding down the control key (e.g. a hole and a fillet) and then select the pattern icon.
-- Submitted by Phil Harrison, CATIA Solutions Magazine benchmark tester and principal of LionHeart Solutions, Inc.
---------------------------
WINDOWS XP TIP - When re-installing a machine with Windows XP, or upgrading to XP from Windows NT or Windows 2000, be careful which graphics drivers are loaded; although XP comes with a vast library of drivers, they may not be the fastest. For example, I recently reloaded a system with an NVIDIA Quadro2 Pro graphics card. Windows XP Professional recognized the adapter and a driver was loaded. However, when I ran CATbench on the system, I found that the performance was surprisingly slow. I then upgraded the driver with one from my hardware vendor and re-ran the CATbench graphics tests and got a performance increase of about eight times.
-- Also submitted by Phil Harrison
-------------------------
V5 NC PROGRAMMING TIP - This tip is useful in NC Programming when the machining axis is different from the design axis. The predefined views (top, front, etc.) are usually not oriented the way you need them. Selecting the Normal View icon will bring the plane parallel to the screen, but most of the time you also need to rotate the part. One way to get the orientation you want is to orient the part as needed and then create a named view (View + Named Views + Add). This view can be recalled later with View + Named Views + Apply. Another method consists of creating an axis system in the NCGeometryxxx.catpart (toolbar Tools + Axis System). This axis system should be oriented in the view you want to create. When the axis system is created, small lines that represent the basic planes will appear near the axis; select one of these lines. Hook the compass on the selected line. The compass is now oriented like the axis system. Lock Current Orientation of the compass with MB3. You may now put the compass back to its original location. To orient the views, select one letter on the compass (U, V or W).
-- Submitted by Jean-Pierre Pigeon, Support NC Inc., Laval, Quebec, Canada
-------------------------
V5 TRICK - EMBOSSING TEXT - Create a new CATDrawing. Select a simple font and appropriate size. Select the Text Icon and a location near the origin of the default view. Save the CATDrawing for later reference. Save the same file as a .dxf. (This creates line segments.) Open the .dxf and select the lines, Copy (Ctrl+C). Create a plane on the part that you want to emboss. Create an offset plane or surface to define the pocket bottom of the embossing text. Select the Sketcher Icon and the Sketch Plane. Paste the .dxf lines (check orientation) and translate them into position. (This can be tedious.) Return to the file saved in Step 4, if the text requires mirroring. Exit Sketcher and select the Pocket Icon. Use Up to Surface for the second limit and select the other plane/surface.
-- Submitted by Ray Anderson, Lead KBE Engineer
---------------------
NEW V5 TECH TIP - How to log into V5 without automatically launching a new product: Right-click on the CATIA V5 Icon. Go to Properties. You will see the target: "C:\Program Files\DassaultSystemes\B08\intel_a\code\bin\CNEXT.exe" -env CATIA.V5R8.B08 -direnv "C:\Documents and Settings\All Users\ApplicationData\DassaultSystemes\CATEnv". Add a space and the letter c to the end of this path. It now looks like this..."C:\Program Files\DassaultSystemes\B08\intel_a\code\bin\CNEXT.exe" -env CATIA.V5R8.B08 -direnv "C:\Documents and Settings\All Users\ApplicationData\DassaultSystemes\CATEnv" c. Save and close this change. Start CATIA V5 with this icon. Whamo-CATIA will launch without launching a new product!
-- Submitted by Ken Page, DaimlerChrysler Certified Intern, Michigan
--------------------------------
RESPONSE TO LAST WEEK'S TIP (SEE BELOW) - This method works pretty well, but if you have a lot of points then you must keep scrolling through ANALYZE and selecting PRINT, and then edit the PRINT file to remove unwanted or duplicate info. I have found that for a large number of points, it is best to create an NC Set (Program) with the NCMILL function. Then pick your points using NCMILL + DEFINE + MACHINE + TIP. Using UTILITY + CATNC, select the NC Set you have just created. Execute this and it will create an aptSource file that will have your point data in it. You can further this process this by using a postprocessor (i.e., CAM-POST by ICAM Technologies, Inc.), which converts the aptSource file to NC machine tape file. Depending on your postprocessor (and if you do a lot of this type of data gathering), a special postprocessor template can be created that will output only the point data, instead of the machine commands mixed in with your data. You also could have the postprocessor set up to output the file formatted with a "," separating the X,Y,Z coordinates that would allow you to import your point data into a spreadsheet for further analysis.
-- Submitted by Colin Crowe, tool designer, Boeing Canada Technology Arnprior Div.
------------------------------------
UPDATE FOR V5 TIP FROM CDD JUNE 4 - I have another way to do the V5 Tech Tip from June 4. Steps 1-3 are the same: Right-click on the CATIA V5 Icon. Go
to Properties. You will see the target: "C:\ProgramFiles\DassaultSystemes\B08\intel_a\code\bin\CNEXT .exe" -env CATIA.V5R8.B08-direnv "C:\Documents and Settings\All Users\ApplicationData\DassaultSystemes\CATEnv." Add text, -object "C:\catiamodels\Customdefault.CATPart," after the environment definition and before the -direnv command. It now looks like this..."C:\ProgramFiles\DassaultSystemes\B08\intel_a\code\bi n\CNEXT.exe" -env CATIA.V5R8.B08-object "C:\catiamodels\Customdefault.CATPart" -direnv "C:\Documents and Settings\All Users\ApplicationData\DassaultSystemes\CATEnv." CATIA will launch with your own default model.
-- Submitted by Antti Aho-Mantila, CAx trainer, Patria Aerospace Structures, Finland
ویرایش توسط bigbang : 06-04-2014 در ساعت 11:40 AM
|
06-04-2014
|
|
مدیر بخش مکانیک - ویندوز و رفع اشکال |
|
تاریخ عضویت: Sep 2009
نوشته ها: 2,586
سپاسها: : 5,427
6,159 سپاس در 1,794 نوشته ایشان در یکماه اخیر
|
|
طراحی پارامتریک چیست؟
از این مشکلات در طراحی بروش مهندسی مستقیم یعنی وقتی که طرح انتزاعی باشد زیاد رخ می دهد این مشکل ودیگر مشکلاتی که در کتاب کتیا برای دانشجویان فرا خواهید گرفت سبب شد تا شرکتهای سازندۀ نرم افزارهای طراحی به کمک کامپیوتر چارهای برای رفع نیاز طراحان بیندیشند واین گونه نرم افزارها را با عنوان نصل جدید(نصل چهارم) وارد بازار کنند . شایان ذکر است که نرم افزارهای نصل پنجم به عنوان نرم افزارهایی اتلاق میشود که علاوه بر امکانات موجود در نرمافزارهای نصلهی قبل از خود، قابلیتهایی همچون مدیریت چرخه حیات محصول، به اشتراک گذاری اطلاعات[1] ، تولید یکپارچه، مهندسی بکمک کامپیوتر وهمچنین ساخت بکمک کامپیوتررا در خود جای داده اند که نرم افزار کتیا یکی از قویترین آنان میباشد. طراحی پارامتریک چیست؟ هنگامی که شما پشت کامپیوتر نشستهاید وقصد دارید با یکی از نرم افزارهای CAD طرح خود یا دیگران را پیاده کنید، عملا بجز وارد کردن اطلاعات خود ویا دیگران کاری انجام نمیدهید.امروزه برای طراحان وصنعتگران چیزی که مهم است ،پردازش و استفاده بهینه ازاین طلاعات است. همین امر باعث شده که امکانات طراحی پارامتریک در نرم افزارهای جدید جایگاه ویژهای را به خود اختصاص دهد. بهطور کلی طراحی پارامتریک یعنی مقید کردن طرح بواسطه روابط منطقی بین پارامترهای دخیل در طراحی که طراح بکمک وارد کردن اطلاعت به شکل فرمول، قانون ،ثوابت عددی یا هندسی وغیره آن راایجاد میکند و اصطلاحا طراحی را دارای شخصیت[2]میکند. چرا طراحی پارامتریک؟ ۱- اگر میخواهید از علومی چون استاتیک ، دینامیک ، مقاومت مصالح ، طراحی اجزا ، علم موادو....،استفاده کنید و تاثیرات تغیرات آنها را لمس کنید ولذت ببرید حتما پارامتریک طراحی کنید. ۲-اگر میخواهید کارتان مهندسی پسند باشد ودیگران به راحتی متوجه طرحتان شوند ، پارامتریک طراحی کنید. ۳- اگر میخواهید یک قطعه و یا یک مجموعه هوشمند داشته باشید. ۴-و اگر میخواهید جلوی اشتباهات ناخواسته را بگیرید و درنتیجه در زمان صرفجویی کنید. چرا CATIA ؟ بطور خلاصه باید گفت در بین نرم افزارهای موجود امکانات CATIA از دیگر نرم افزارها بیشتر است و هرچه امکانات بیشتر باشد طراحی پارامتریک بیشتر خود نمایی میکند.از طرفی ابزار زیادی برای اینکار در CATIA وجود دارد بطوری که بجز امکاناتی که در دیگر نرم افزارها وجود دارد ، یکی از محیطهای این نرم افزار به این کار اختصاص داده شده. محیط دانش مشاوره در یک نگاه Knowledge Advisor یکی از محیطهای CATIA میباشد که به طراح این اجازه را میدهد تا دانش خود را وارد طراحی کند و یک شیوه همکاری در تصمیمات مهندس برای کاهش خطاها یا اتوماتیک کردن طراحی برای حداکثر بهرهوری اجاد کند. طراحان میتوانند دانش خود را از قبیل فرمولها ، قواعد منطقی ، و تکنیکهای بازرسی راوارد طراحی کنند وهنگام نیاز از آنها استفاده کنند در هر زمان که بخواهند (حین طراحی یا بعد از آن)، مطابق با تعریف خود به صورت فعال و یا غیر فعال. به عنوان مثال پارامترهای متغیر در طراحی هنگام بهینه سازی میباست تغیر کنند و این پارامترها روی تمام ویا قسمتی از طرح تاثیر میگذارند. این متغیرها از هر خصوصیت (طول،زاویه،جنس،دما،زمان و....) که باشند میتوانند در طراحی دخیل شوند این اسانترین وسریع ترین راه برای یافتن خطاهای طراحی است. به طور خلاصه knowledge advisor به طراح کمک میکند تا؛ به وسیله دانش مهندسی خود به طراحی شخصیت دهد و با وارد کردن مشخصات مراحل طراحی را سازگار کند طراحی رابرای همه عوامل دست اندرکار قابل فهم کند. یک محصول هوشمند طراحی کند بطوری که قابل مدیریت واستفاده مجدد باشد باشد. · با وارد کردن استانداردها، طرح مطئنی ایجاد کند. ·افزایش بهروری(زمان، هزینه، انرژی) اجازه دادن به طراح تا تصمیمات اولیه خود را در طرح پایانی تغیر دهد. راهنما و همکار طراح بین اهداف وروشهای مورد استفاده وی.
ویرایش توسط bigbang : 06-04-2014 در ساعت 12:04 PM
|
06-04-2014
|
|
مدیر بخش مکانیک - ویندوز و رفع اشکال |
|
تاریخ عضویت: Sep 2009
نوشته ها: 2,586
سپاسها: : 5,427
6,159 سپاس در 1,794 نوشته ایشان در یکماه اخیر
|
|
catia tuturial (آموزش زبان اصلی)
ویرایش توسط bigbang : 06-04-2014 در ساعت 12:14 PM
|
06-04-2014
|
|
مدیر بخش مکانیک - ویندوز و رفع اشکال |
|
تاریخ عضویت: Sep 2009
نوشته ها: 2,586
سپاسها: : 5,427
6,159 سپاس در 1,794 نوشته ایشان در یکماه اخیر
|
|
چگونه در کتیا فارسی بنویسیم ؟
برای اینکار مطابق مراحل زیر عمل کنید۱- نرم افزار LeoMoon Persian را از یکی از دو لینک زیر دانلود کنید.
۲- متن مورد نظرتون رو توی این نرم افزار بنویسید و رو دکمه کپی در همین نرم افزار کلیک کنید.
۳- در نرم افزار کتیا یک تکست ایجاد کنید و در کادر باز شده برای نوشتن، چیزی ننوسید و بجاش کلیدهای ctrl+v رو فشار بدید تا متن درهم ریخته ای ظاهر بشه
4- همانطور که متن در حال انتخاب است نوع فونت را به یکی از فونتهایی که به حرف f شروع میشوند تغییر دهید. فقط یادتان باشد که زود نا امید نشوید و اگر لازم شد تمام فونتهایی که با f شروع میشن رو امتحان کنید. حتی اگر لازم شد فونتهای فارسی نصب کنید که با f شروع بشن.
|
06-04-2014
|
|
مدیر بخش مکانیک - ویندوز و رفع اشکال |
|
تاریخ عضویت: Sep 2009
نوشته ها: 2,586
سپاسها: : 5,427
6,159 سپاس در 1,794 نوشته ایشان در یکماه اخیر
|
|
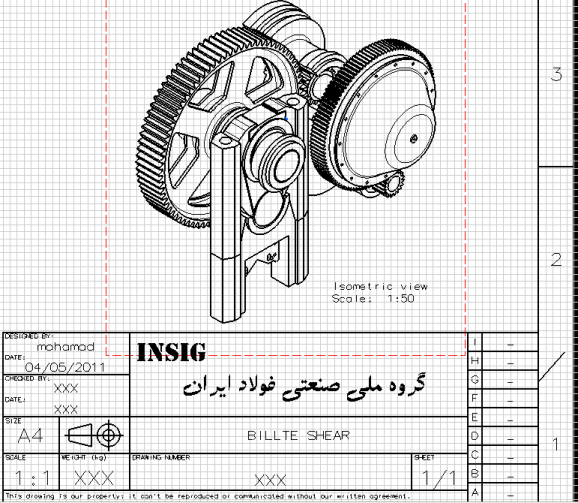
نقشه دستگاه پرس
|
06-04-2014
|
|
مدیر بخش مکانیک - ویندوز و رفع اشکال |
|
تاریخ عضویت: Sep 2009
نوشته ها: 2,586
سپاسها: : 5,427
6,159 سپاس در 1,794 نوشته ایشان در یکماه اخیر
|
|
طراحی مکانیزم و نمودارهای مربوطه
طراحی مکانیزم و نمودارهای مربوطه
|
06-04-2014
|
|
مدیر بخش مکانیک - ویندوز و رفع اشکال |
|
تاریخ عضویت: Sep 2009
نوشته ها: 2,586
سپاسها: : 5,427
6,159 سپاس در 1,794 نوشته ایشان در یکماه اخیر
|
|
تمرین های آماده کتیا
ویرایش توسط bigbang : 06-04-2014 در ساعت 07:38 PM
|
06-13-2014
|
|
مدیر بخش مکانیک - ویندوز و رفع اشکال |
|
تاریخ عضویت: Sep 2009
نوشته ها: 2,586
سپاسها: : 5,427
6,159 سپاس در 1,794 نوشته ایشان در یکماه اخیر
|
|
فیلم های اموزشی نرم افزار catia
در این پست قصد داریم تعدادی فیلم اموزشی برای نرم افزار قدرتمند کتیا در اختیار شما دوستان گرامی قرار دهیم . همانطور که می دانید این نرم افزار کاملترین نرم افزار طراحی است. از چه نظر؟ از این نظر که با این نرم افزار شما می توانید نقشه دو بعدی مورد نیاز خود را بکشید , طراحی سه بعدی انجام دهید , G کد ماشینکاری قطعه را دریافت کنید و در نهایت به انالیز قطعه ساخته شده بپردازید. پس علاوه بر کتب اموزشی فیلم های اموزشی نیز تاثیر بسزایی در یادگیری این نرم افزار فوق العاده خواهند داشت.
دانلود فیلم ششم
|
|
برچسب ها
|
catia tutorial book handbook, catia فارسی, fixture, fundamentals, part design, piston, surface-modeling, training, نقشه, نرم افزار catia, کتاب, کتاب فارسی, کتاب فارسی کتیا, کتاب آموزش کتیا, valve, تمرین, طراحی  |
|
کاربران در حال دیدن موضوع: 1 نفر (0 عضو و 1 مهمان)
|
|
|
 مجوز های ارسال و ویرایش
|
شما نمیتوانید موضوع جدیدی ارسال کنید
شما امکان ارسال پاسخ را ندارید
شما نمیتوانید فایل پیوست در پست خود ضمیمه کنید
شما نمیتوانید پست های خود را ویرایش کنید
اچ تی ام ال غیر فعال می باشد
|
|
|
اکنون ساعت 10:15 AM برپایه ساعت جهانی (GMT - گرینویچ) +3.5 می باشد.
|


 حالت ترکیبی